SSD can give your computer a superb boost and make your applications start almost instantly unlike HDD’s where applications may take more time, depend on the space filled and memory it requires to run. However, hard drive is still a top runner when it comes to storing bunch of files and user data but may results in low performance over time due to degraded equipment. So, it’s better to move your current OS from the old HDD to a brand new SSD to get maximum possible speed and use your old drive to store as much data as you want.
Clean installation of Windows in new SSD would be much easier but may force you to start everything from scratch such as installing all the programs once again, copy data to the drive, customize windows the way it was before etc. So, if you don’t want to take that much headache and simply want to put everything from the old drive to new SSD, we’re describing few simple things to get this done easily.
What you need?
You’ll require SSD drive to use as a destination device and the old drive as a source drive to migrate Windows 8. Keep in mind that SSD prices are almost double as compare to the normal hard drives but you can take a low capacity solid state drive (at the cost of normal drives) to put only Windows and install programs you can’t live without. However, make sure the SSD capacity is equal or greater than the size of C: drive. If the C drive is too big, you can take backup and then delete files from c:\users\. We’ll need this backup later to restore everything back to the old drive. Make this backup copy as updated as possible, just to be sure that you’re not missed anything updated recently. You can use external hard drive or the spare removable storage device to secure the backup copy.
Note: As the process is little tricky and anything could go wrong. Keeping a copy of professional Windows data recoWindowsvery software is recommended to recover any lost, deleted or formatted data.
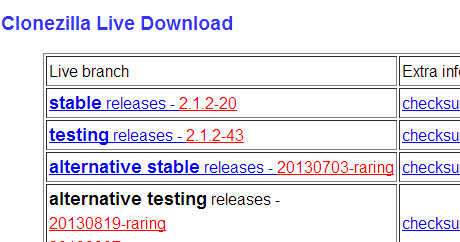
We’ll need a free Drive Cloning tool, called Clonezilla also known as Clonezilla live as you’ll need get an ISO copy of Clonezilla and thereafter, have to create a bootable USB or CD/DVD. Once you’ve opened the website, click on stable release and the ISO file will begin downloading. Burn the downloaded ISO copy to USB or bland CD using imgburn.
During ongoing cloning process, Clonezilla tends to format the destination drive. So it’s recommend to create a prior backup copy or move entire data to an external drive such as USB or flash drive.
Note: Before continuing with this migration, make sure that you’ve cleared enough files and defragmented the drive to get some extra free space. This is to ensure that the current partition size is at the lowest and could easily fit to the solid state drive.
How to Migrate?
Hook up your SSD to your computer in the available slots and remove hard drive after taking updated backup.
Restart your computer and the created USB or CD will take care of the rest such as automatically boot your system using the same and provide various options to clone HDD and transfer it to SSD. If your computer didn’t start automatically using the bootable USB or CD, change the boot sequence from the BIOS option.
After choosing the display size and preferred language, you’ll get an option to start cloning the drive using Clonezilla.
Note: Choose Device to device cloning option when screen appears to choose the desired cloning method.
Once you’ve completed with SSD migration, reconnect the old drive back again and format it to erase everything on the drive and restore files from the backup copy we’ve created previously.
That’s it. You have now Windows 8 installed on your computer with spare drive left to store almost anything else you want. Just make sure to thoroughly read your SSD user manual to keep it maintained and free from troubles.
Clean installation of Windows in new SSD would be much easier but may force you to start everything from scratch such as installing all the programs once again, copy data to the drive, customize windows the way it was before etc. So, if you don’t want to take that much headache and simply want to put everything from the old drive to new SSD, we’re describing few simple things to get this done easily.
What you need?
You’ll require SSD drive to use as a destination device and the old drive as a source drive to migrate Windows 8. Keep in mind that SSD prices are almost double as compare to the normal hard drives but you can take a low capacity solid state drive (at the cost of normal drives) to put only Windows and install programs you can’t live without. However, make sure the SSD capacity is equal or greater than the size of C: drive. If the C drive is too big, you can take backup and then delete files from c:\users\. We’ll need this backup later to restore everything back to the old drive. Make this backup copy as updated as possible, just to be sure that you’re not missed anything updated recently. You can use external hard drive or the spare removable storage device to secure the backup copy.
Note: As the process is little tricky and anything could go wrong. Keeping a copy of professional Windows data recoWindowsvery software is recommended to recover any lost, deleted or formatted data.
We’ll need a free Drive Cloning tool, called Clonezilla also known as Clonezilla live as you’ll need get an ISO copy of Clonezilla and thereafter, have to create a bootable USB or CD/DVD. Once you’ve opened the website, click on stable release and the ISO file will begin downloading. Burn the downloaded ISO copy to USB or bland CD using imgburn.
During ongoing cloning process, Clonezilla tends to format the destination drive. So it’s recommend to create a prior backup copy or move entire data to an external drive such as USB or flash drive.
Note: Before continuing with this migration, make sure that you’ve cleared enough files and defragmented the drive to get some extra free space. This is to ensure that the current partition size is at the lowest and could easily fit to the solid state drive.
How to Migrate?
Hook up your SSD to your computer in the available slots and remove hard drive after taking updated backup.
Restart your computer and the created USB or CD will take care of the rest such as automatically boot your system using the same and provide various options to clone HDD and transfer it to SSD. If your computer didn’t start automatically using the bootable USB or CD, change the boot sequence from the BIOS option.
After choosing the display size and preferred language, you’ll get an option to start cloning the drive using Clonezilla.
Note: Choose Device to device cloning option when screen appears to choose the desired cloning method.
Once you’ve completed with SSD migration, reconnect the old drive back again and format it to erase everything on the drive and restore files from the backup copy we’ve created previously.
That’s it. You have now Windows 8 installed on your computer with spare drive left to store almost anything else you want. Just make sure to thoroughly read your SSD user manual to keep it maintained and free from troubles.
No comments :
Post a Comment
TELL WHAT YOU THINK