How to make bootable  backups for Mac OS X?


With passing days, the Mac OS X is going to be an old machine and fully vulnerable to any kind of disasters including a hard drive failure, logic-board failure and OS X inaccessibility. At times, there could be other reasons such as stealing, damages etc. that makes separation between the user and the OS X.
The hardware & system troubles might be avoided to some extent but can't be completely stopped from happening. Failures are unpredictable, even a fine running Mac OS X in the morning time may ends up with no access during the evening. In that case, the user's mind is griped only by two thoughts -

  • Is my Mac going to be fine again?
  • What about those plenty of files which seems compromised now?

Sorry to add an additional regretful thought which sounds like this:
  • Wish I had backed up all my data.

So, we arrive to a conclusion that no matter what the condition of my Mac machine, it needs to be backed up regularly. The Mac backup copy does exactly, a stepney stored in the boot of the car does during tyre puncture. Both, the backup copy of the OS X and the stepney of the car makes you get going.

Resource required for creating backup copy:
Portable hard drive are cost-effective and easily available backup resources. With the external hard drive in your hand you can choose any kind of backup method including time machine or partition cloning. For Intel Mac 10.5 and the most recent versions, the external hard drive is best suited to be assigned for a time-capsule. Thought Time Machine makes you travel back in time and access your files, documents etc., it is a big 'no' when you need to boot a troubled Mac. Even you reinstall or upgrade your OS X then also you need to transfer the time machine data with the help of in-built source 'Migration Assistant'. This is hectic and can be overruled by the cloning the desired partitions of the Mac.

Super Advantage of a clone: It is an accurate twin copy of the source hard drive and ready to boot the system anytime. With a portable hard drive by your side, the only missing tools is a drive clone utility. But before we clone, assure that the destination hard drive is formatted as Mac OS Extended Journaled. If not, then jump to disk utility<<ERASE tab and select the destination drive. Choose the above file format for the hard drive & proceed.

Clone, shall we?
  • Install & launch the clone app,
  • In the clone menu, assign Source & Destination drives,
  • Now proceed with cloning. After a few matter of minutes, the utility will be ready with a backup copy of your Mac OS X. Feel Relived.

Few other advantages of a drive clone application:
  • Clones even a SSD, MBR file system, NTFS & ExFAT.
  • Utilizes the space on destination drive by resizing it.
  • Some drive clone utilities also puts an option to create an image of the hard drive. This is best suited when the drive is on the verge of failure and you need to back up all the good part of the drive.

If you love your Mac and never want to loose a single megabyte of data from your storage mediums then you must ensure efficient backup either through Time-Machine or with clone. But it is too good if you clone keeping almost an installation disk type backup with you.

How Windows 8 is Performing after Four Month of It's Release

Image Credit: Bobfamiliar
Microsoft's Windows 8 has been released on 26th October 2012 and over 4 months have been completed so far. So, It’s better to DIGG deeper about how well windows 8 is performing in the real world and the level of satisfaction the user has with this brand new and fastest OS (as claimed by Microsoft) in the OS industry.

Windows 8 becomes the rapidly adopted OS in Microsoft History where 60 million copies were sold out after its general availability, which is quite large as compare to Windows 7 sales or any previous Windows OS. However, Windows 8 received negative feedback in massive amount which enforces Microsoft to rethink about Windows 8 design and replacing some core features like re-placing start button again in Windows 8 beta, forecast windows next release. 

The news is also murmuring in the technology world that Microsoft will allow booting windows 8 directly to desktop mode instead of giving tiles and charms bar or metro screen after booting. Hopefully that will, to some extent, improves the Windows 8 adoption level and helps them to get their old Windows like PC back again. 

In recent weeks, upgrades to Windows 8 from Windows 7 are fallen below the expected level and remains at quite invisible figure. Known reasons behind this could be lack of old drive support by Windows 8, unimpressive Metro screen, confusing Apps screen etc. that forces users to stick with Windows 7 or whichever version of Windows they were using.

At business or enterprise level, Windows 8 have quite high adoption rate because of few great Windows 8 features like storage spaces, file history, hybrid booting etc. These features could allows businesses to keep their data safe, maximize the utilization of externally attached storage devices using storage spaces and improve productivity using fast booting, optimized PC performance.

Last month, Microsoft released surface tablet with Widows 8 pro at an easily acceptable cost around $299 USD. This tablet has improved functionality and high capability than previously introduced tablet from Microsoft; Surface RT with ARM based processors.

Overall, Microsoft's Windows 8 have pretty advanced features which might not suites well to novice or beginner computer users. Due to high market capture and large consumer base from around the world, Microsoft would have been able to attract more consumers.

Microsoft never want to distract their customer as always and would expect to re-launch beta version of Windows 8, possibly in the July end. It'll surely include all the expected and demanding changes to be the best replacement of Windows 8.

Smart Finder Replacing Finder in Mac


In addition to its very own built-in Disk Utility, Finder is one of the most interesting and helpful tool in Mac OS X. The developers call it as the ‘Heart’ of Mac. It is the default file manager cum file browser in Mac, which takes care of the complete user-management of the hard drive, individual volumes, files, and even network drives. There are a slew of similar tools available in the computer market; some might match its features and functionality while a few others do not. Stellar Smart Finder is a similar category application for Mac operating system that has been proving itself an edge over Mac’s very own Finder app. It scans complete the hard drive, CD/DVD, externally attached removable storage devices and displays the result in three different types of views i.e. Graphical View, Column View, and List View of the data.

Software interface is divided into two panes i.e. left and right. The left pane displays all the volumes of the Mac hard drive below network drive, if any. An engrafted search bar in the tool bar provides quicker and reliable search results that make it an efficient pathfinder Mac application. Clicking a drive in the left pane displays the result in a hierarchical view. Every individual selected folder in this view is displayed at the core of Sunburst Chart along with it size in the right pane. When you click a particular sector of in this chart, path of the associated folder is displayed under the chart.


Sunburst Chart is a smart way of representing the hierarchy with an advantage that it is able to display the size of each folder or group in a particular hard drive sector. In addition, the center of the chart represents the root of the folder along with its size when cursor is moved over it. Right clicking a file or folder in the left pane of the software provides three options i.e. ‘Reveal in Finder’, ‘Remove’, and ‘Open’.  Reveal in Finder opens the containing folder while ‘Remove’ deletes that particular file and ‘Open’ is just to open a file or folder. Column view in the toolbar creates the view in the fly-out column list. When you click a folder in this view, a similar view is created next to it and so on. Moreover, multiple simultaneous file operations are facilitated in Stellar Smart Finder in order to accelerate the file access.

These overall smart features make it a better choice for Mac users around the globe.

What is Hybrid Boot in Windows 8 and How to Enable or Disable It?

Windows 8 is rebuilt and completely redesigned OS with fast booting capability unlike any other OS. Using Windows 8 will never let you feel sluggish or dizzy with so much entertaining features and tough security around.

Windows 8 uses hybrid booting as a key component to start on or off your system and thus, making it the fastest booting OS (nearly 8 seconds to load all drivers, initialize kernel and reach at the desktop).

In the Hybrid boot mode or say log off + hibernation mode,  system driver and all the running state information will temporary saved in hibernation file and initialize automatically the next time you start the system. Therefore, instead of starting all the system core files, Windows 8 will use the stored session information and start system more efficiently.

Hybrid mode is enabled by default so you could taste its benefits. Though, in case if you want to disable it, can do so by following the steps mentioned below in this article.

Note: If you've multi boot OS or have more than one version of Windows, hybrid boot sometime skip the OS choice menu and directly take you to the desktop. This is little weird but that's why you need to disable hybrid boot mode in multi boot OS environment.

How to Disable Hybrid Boot Mode
Disabling hybrid boot could result in extended startup duration and thus, more power consumption or battery power and system resources. Disabling hybrid boot isn't recommended and should be avoided if you're running a PC/Laptop with only single OS or didn't faced any problem so far.
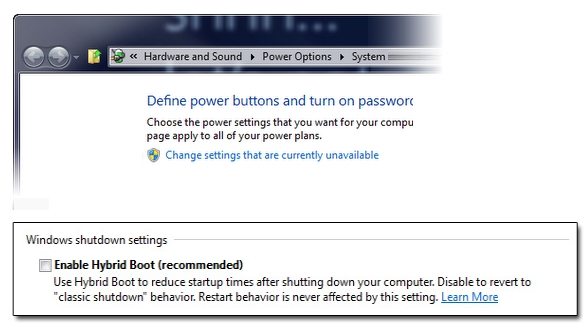
                           disable-hybrid-boot-mode

Though, if you really want to disable hybrid boot, here's how to do it:
  • Go to Control Panel > Hardware and Sound > Power Options > System Settings.
  • Navigate to bottom of the window and uncheck the box stating Enable Hybrid Boot (Recommended).
  • Click on Save Changes and restart system to let changes take effect.
To enable it again, you need to follow the same steps again except to check mark the box than uncheck. You're all set and good to go.

Good Luck!!

How to run Windows 8 on your Mac OS X?

Both Apple & Microsoft made the year 2012, the year of operating systems by launching OS X Mountain Lion and Windows 8 respectively. Below is the quick look of both the OSs.

Windows 8

OS X Mountain Lion
OS X Mountain Lion 10.8 is widely accepted & the most popular OS till date. The features of OS X ML are enormously helpful to gain superb working environment.

Talking of a makeover, then no OS in the history is as beautifully manipulated as the Windows 8. The colorful square boxes on the main screen of the Windows 8 are called 'TILES', which gives user an environment of awesomeness.

Installing Windows 8 on a Mac OS X -

Requirements:
  • MacbookAir, Macbookpro, iMac, Mac Mini
  • Windows 8 DVD/ISO copy, bootable USB will also do
  • 10GB of hard drive free space.
  • Note that, the hard drive should be a single partition drive. With more than 1 partition you won't be able to get Windows on it through boot camp. Virtually, it is still possible with the help of the PARALLELS.
Boot Camp is the dual boot OS facility enabling a user to install both an OS X and Windows OS copy on the same machine. Boot Camp was rolled out with 10.5 Leopard OS and now permanently included under the option -

Finder<Application<Utilities<Boot Camp Assistant

Follow the sequential steps to get Windows 8 installed on Mac:

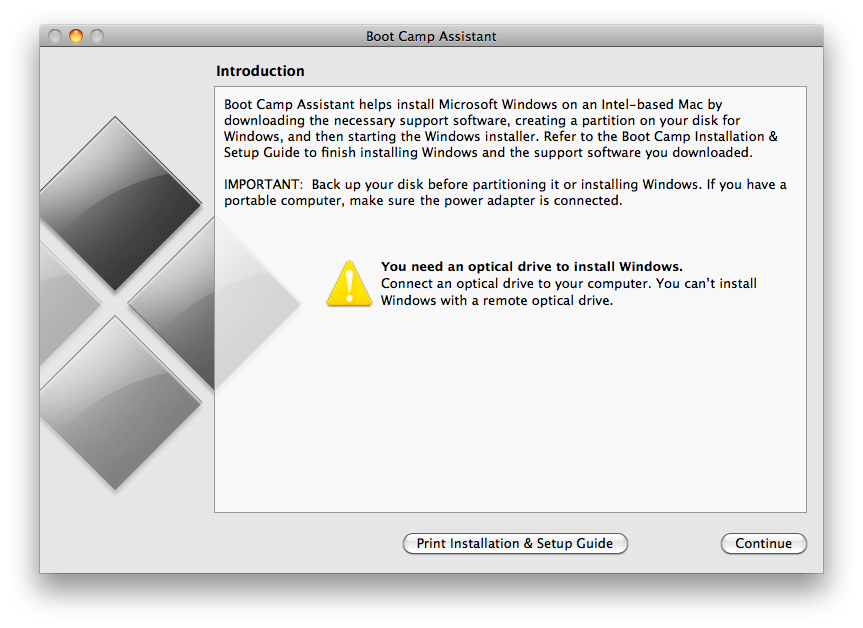
  • Connect/Insert USB or DVD to your Mac machine & launch the Boot Camp utility. The boot camp assistant gives you option to download Windows, Install Windows & Install supported software for you Windows. For a better OS experience you can choose to get all necessary drivers and required software.
    PCWorld.com
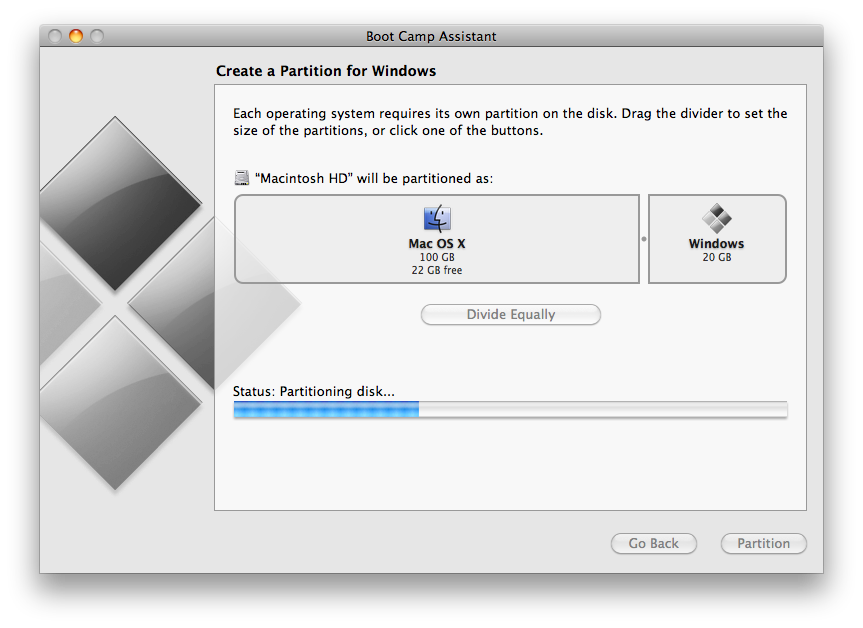
  • Once the above activity is done, it is time now to define a dedicated partition for Windows 8 Installation. It is recommended to allow attest 20 GB (64-bit) of partition for Window 8 OS.
  • Hit the 'Partition' button to actualize your settings.
  • The OS X will restart & would initiate the installation of windows 8 by giving you the option to select the bootcamp partition from the list of other partitions. In this particular menu, there are advance options like 'Drive Options', which would come to help if the process reports the error - “Windows cannot be installed to this hard disk space. Windows must be installed to a partition formatted as NTFS.”
  • All set up, Windows installation will take its own time and after that you can install the support software for the Windows 8.
When you get started on Mac, press-hold the OPTION key to make appear the OS selection menu. From there, select either of the Installed OS to boot from.

[Also Read: Windows 8 Keeps Freezing at Boot Screen, Here's How to fix it?]

3 Major Points of Attraction of Microsoft Surface With Windows 8 Pro

Microsoft keeps their promise by releasing Surface with Windows 8 Pro recently, exactly after the 90 days of Windows 8 released in late October 2012. There's a lot more to explore in MS brand new Surface tablet but it might be weird to know that it costs as much as a high spec Laptop ($900, Little big) for 128 GB model. However, If you keep money aside, this ultra-book like tablet have some good advantages over other manufacturer's tablet or Microsoft itself previous surface tablet i.e. RT.

Surface Pro provides all the luxuries of Windows 8 in compact form and packed with Intel based processor instead of ARM processors.

So hold your breath and start exploring the points and see if any of them would meet with your need. 

Design:


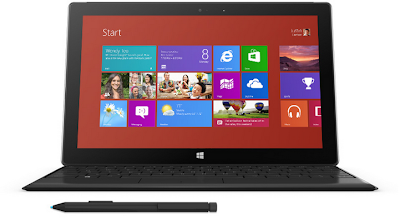
                    surface-pro-windows-8

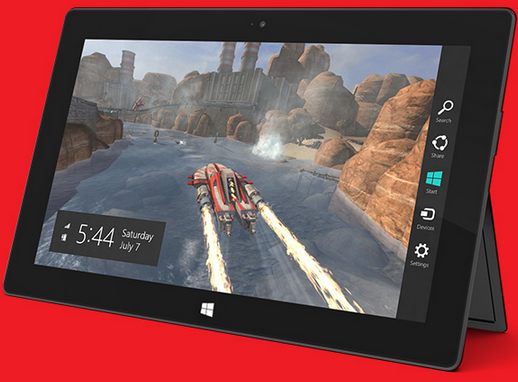
Great design of Surface Pro got the first spot in the list of 10 best things to explore. A kickstand on the backside and optional keyboard are much more improved and will soon available in custom colors. Surface Pro is much like an ultra-book and have a large screen size of 1920x1080 (10.6 inch HD display), but would be a little heavier and thicker than the Surface RT.

Though, Surface Pro is compact in size, you can still able to play high quality graphics demanding games and HD videos with same functionality as in Windows 8 PC's or Laptop's. 

Surface Pro got single USB 2.0 port and two USB 3.0 ports along with one Mini-Dislplay port for video output. Microsoft needs to slightly get better on making additional USB ports as less USB ports could be little disappointing for user like us who loves to have lot of USB ports to make it more like PC's or Laptops.

Great Specs:

               surface-pro-graphics


Though, Microsoft Surface Pro got heavier in specs in the same compact size. Below are few great specs of Surface Pro in short which is almost double as compare to old Surface RT having 32 GB or 64 GB of capacity, 3 GB of RAM and ARM based processor,

Processor: Intel Core i5 1.7 GHz
Memory: 4 GB RAM
Storage Capacity: Available in two modes, 64 GB or 128 GB.
Graphics Card: Intel HD 4000

Third Party Software and Thousands of Free Apps:
Surface Pro removes the barrier of Surface RT which limits you to have certain series of supported apps, but now you can have as many software or apps as you want in your tablet. This is because MS has upgraded the processor from ARM to i3. Important to say that ARM processor resists installing unsigned version of applications and offer you to use only apps that are available in the MS apps gallery.

What's more, you've everything that any tablet should or even more. You'll definitely get high performance and speedy booting with this feature enrich tablet than the existing tablet in the market.  Surface Pro price could a form factor for user and might get little less attention of middle class citizens who still love to have Google Nexus or any Apple products.